 Nail art is so much fun, especially when it’s food-related! Am I hungry? Probably! I’m hungry for fun(ny) nail art!
Today I wanted to do grape nail art, but decided to put a little quirky twist on it. Here are my The Grapes of Wrath Nails!
Haha, as you can see, the middle finger has a bunch of very upset red grapes. Maybe it’s because the other clusters of purple grapes are staring at him and smiling. Who knows? (I wanted to make the red grapes look angrier, but I goofed up on the eyebrows. Should’ve made the angle more acute.)
What do you think is the background story here? Is Mr. Red Grapes upset because he’s being judged?
When life hands you lemons, make lemonade. And when life hands you sour grapes, make quirky nail art!
The Grapes of Wrath Nail Art Pictures
All swatches have:
- 1 coat of Nail Tek Foundation II Base Coat
- 1 coat of Seche Vite Dry Fast Top Coat
- Background, Whites of Eyes & Smiles: OPI Alpine Snow (Creme White)
- Purple Grapes: OPI Can You Dig It? (Creme Purple) & Rescue Beauty Lounge Scrangie (Shimmery Purple)
- Red Grapes: Rimmel Rapid Ruby (Creme Red) & China Glaze Raspberry Festival (Glass-flecked Red)
- Leaves: Nina Ultra Pro Emerald City (Shimmery Dark Green) & Zoya Midori (Shimmery Light Green)
- Vines: OPI Espresso Your Style! (Shimmery Dark Brown)
- Pupils: OPI Black Onyx
For reviews and/or swatches of specific products, please click on the above links.

Flash

Flash

Flash

Flash

Natural Light

Natural Light

Natural Light

Natural Light

Flash

Natural Light

What I Used:
- Nail Tek Foundation II Base Coat
- Seche Vite Dry Fast Top Coat
- OPI Black Onyx
- OPI Alpine Snow
- Rimmel Rapid Ruby
- China Glaze Raspberry Festival
- Rescue Beauty Lounge Scrangie
- OPI Can You Dig It?
- OPI Espresso Your Style!
- Nina Ultra Pro Emerald City
- Zoya Midori
- Piece of tin foil
- Dotting tool
- Nail-art brush
Step 1: Choose your colors & get all your supplies ready
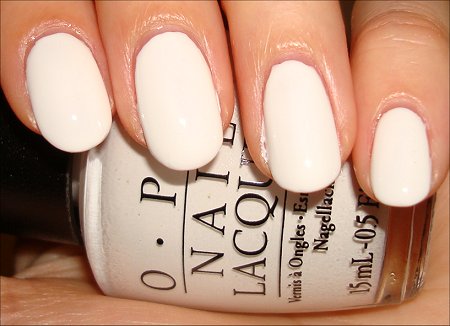
Step 2: Apply your base coat & then your background color
I chose to use a creme-white polish (OPI Alpine Snow) so that the grapes would stand out on this background. Alternatively, you might consider using a nearly-white purple and a nearly-white pink so that the purple and red grapes will stand out, but the contrast won’t be as stark as mine.
Allow this to dry for about 10-15 minutes before proceeding to the next step.
Step 3: Create your purple & red grapes
Note: Each time you use a new color, apply a couple of drops of it in a separate section onto your piece of foil. Use the foil like your palette. Also, try to allow a few minutes in between steps.
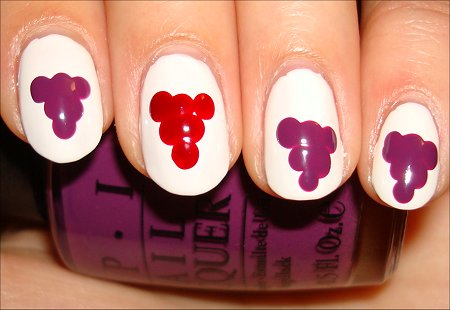
If you have a large dotting tool, use it to create the grape clusters. I did an upside-down pyramid with 3 dots, followed by 2 dots, and then 1 dot. On my thumb, I added more dots since the ‘canvas’ was larger.
Since I don’t own a large dotting tool (just a small one), I looked around to see what I could use instead. I found that the handle of my nail-art brush got the job done. If you don’t have nail-art brushes, try looking at your pens and makeup brushes. They could work.
I put the angry red grapes on my middle finger for a reason…hehe! While I don’t advocate flipping people off, just know that if you do, the grapes will be upside down. I painted it this way because it’s easier to photograph…and also because I don’t actually flip the bird at people!
Step 4: Add dimension to your grapes (Optional)
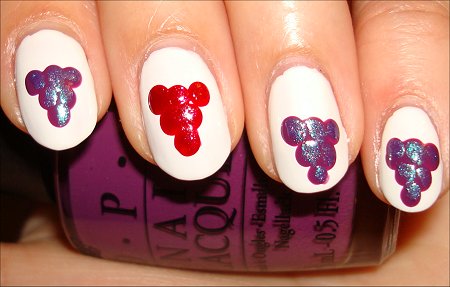
Use your nail-art brush to apply the appropriate colors to highlight each grape in all the clusters. Try not to cover the entire grape. This way, the base colors will still show through, and it’ll make the grapes appear not as flat.
Step 5: Add the vines
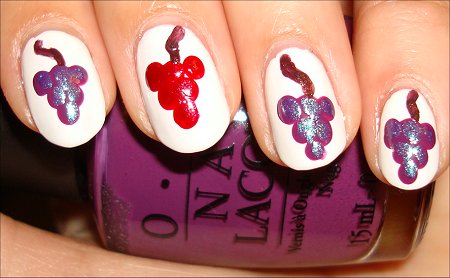
Using your nail-art brush, paint the vine. You could add spirals for a cute effect. I went with the very simple (boring) approach.
Step 6: Paint the leaves & add the whites to the eyes
You could add the whites of the eyes to all of the grape clusters. At this point, I wasn’t sure if I was going to give them all eyes (hehe, sounds creepy), which is why I only added them to Mr. Red Grapes.
Use your dotting tool or something similar to create the shape of the eye whites.
As for the leaves, just paint them on alternating on the vines or however you think is best.

Step 7: Add pupils
For Mr. Red Grapes, I suggest putting the pupils smack dab in the center so it looks like he’s looking at you. For the other grapes, you can make the pupils go off to the side so they look like they’re staring at him. This will put all the focus on our angry star!
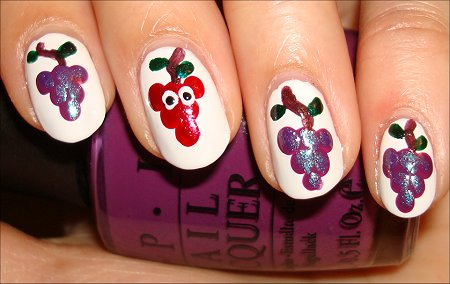
Step 8: Add Mr. Red Grapes’ facial expression & highlight leaves
This is the moment when he starts acting like sour grapes.
I suggest painting the eyebrows with a more dramatic angle so he’s angrier-looking. Mine just ended up looking upset.
(As you can see in the below 2 photos, this is when I decided that all eyes should be on him!)

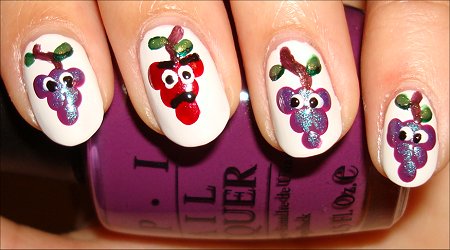
Step 9: Add annoying cheerful smiles to the purple grapes
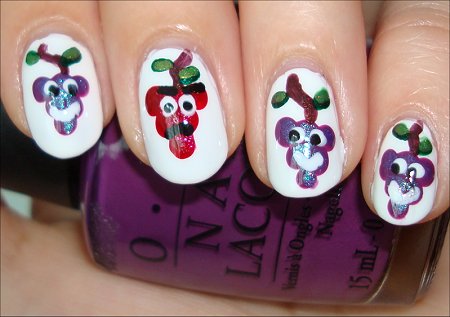
Step 10: Add a top coat
Wait about 10-15 minutes before applying a top coat if you want to avoid any streakiness. This will seal in all your work and help it last longer.
Step 11: Whenever you feel like you’re acting like sour grapes, look down at your nails and remember not to take life too seriously
I hope you enjoyed this silly little manicure I came up with. 🙂
What are your favorite grapes to eat? Do you think it’s neat how dried grapes become raisins? What other fruit or food-related nail art would you like to see me attempt?
Check Out Other Food-Related Nail Art I’ve Done:


That is sooo cool! It made me laugh and I will definitely try this one day.
Thanks for sharing!
Klaine recently posted: Suncoat Girl Nagellack in Apple Blossom
Hey Klaine!
I’m glad that you get my offbeat sense of humor. 😛 This was hands down the most elaborate freehand nail art I’ve ever done. Very rewarding, though. I’m definitely no artist, so if I can do it, anyone with drawing or painting skills could do an even better job at it.
And, yes, you should try this and show me how yours turns out. 🙂
Too cute! Made me smile, so it’s a great way to start the morning. I also liked the eggs in the “skillet” that you did the other day. As for my favorite grapes… Concord if I can find good seedless, but I usually stick with green… I like the tartness. 🙂
Leah recently posted: Chopped: Feeling Blue… Optimistically
Hey Leah!
Thank you so much for saying that – you made me smile, too! 😀
I’m also a fan of seedless grapes, but I think I like all grapes, really. So yummy and refreshing, especially in the summer!
Glad you also enjoyed the Fried Egg Nails I did earlier. I’m going to try to come up with some more silly nail art for future posts, so please visit again soon. 🙂
Ahahaa awesome design Mary! The idea is very cute ;). You are totally on a nail-art-roll!! 😀
Ruthe recently posted: All That Glitters is Gold
Hey Ruthe!
Thanks! 🙂 You’re right, I’m totally on a roll here. 😀 I need to brainstorm some more ideas. I’m having such a great time doing freehand nail art. Very therapeutic for me…I’m extremely stressed out lately, so this provides a positive distraction.
How cute!!!
Kimberly recently posted: Neon Orange Is A Screamer
Hey Kimberly!
Thanks so much! Glad you enjoyed it as much as I did. 🙂
OMG! When I get my dotting tools in the mail this will be the first thing I do! They are SO cute!
thenailaholic recently posted: Franken: Rainbow’s Treasure
Excellent! Looking forward to seeing your nail art! 😀
Where did you get your dotting tools from? I’m thinking about getting a set so I won’t have to use the handle of my brush…haha!
Your funky food nail art makes me giggle each and every time. How fun would it be to be able to look down on edibly-deliciously executed nails 🙂
I really enjoy your attention to detail (as with the shimmer on the grapes)… and your imaginative background story to the red angry grapes… My two little girls would literally bite my fingers off with excitement 🙂
Another winning fun manicure 🙂 No sour grapes from me :)))))
Hey Marta!
Thank you! 😀 It’s so rewarding to do nail art that other people also appreciate.
I have some more food-related manicures in mind. Just need to round up the right colors and then paint away!