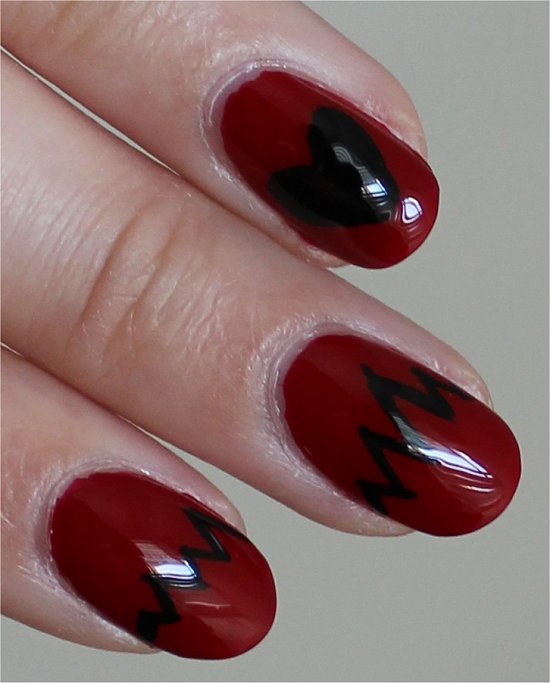
 I’ve seen lots of Heartbeat Nail Art all over the internet for months and always thought how fun it would be to wear and how wonderfully simple it is.
Finally I took a stab at it. It helped that I had already been wearing Zoya Rekha as a manicure for a few days.
Although it’s a very easy design, I still did a nail-art tutorial with some tips and tricks because the Neon Skulls design was the most recent freehand design, and that was some time ago!
If you try this or any of the other nail designs that I’ve shown on Swatch And Learn, please feel free to post them on my Facebook wall so that everyone can see it and be inspired!
Heartbeat Nail Art Swatches
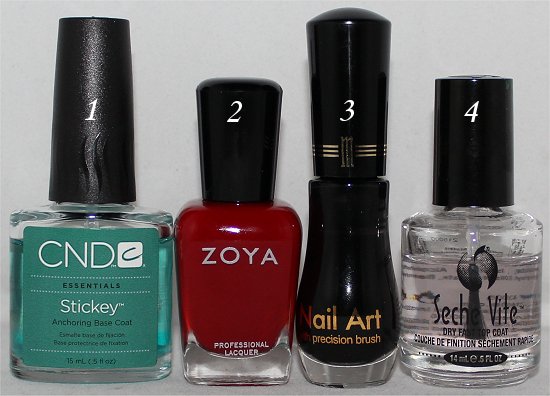
All swatches have:
- CND Stickey Anchoring Base Coat
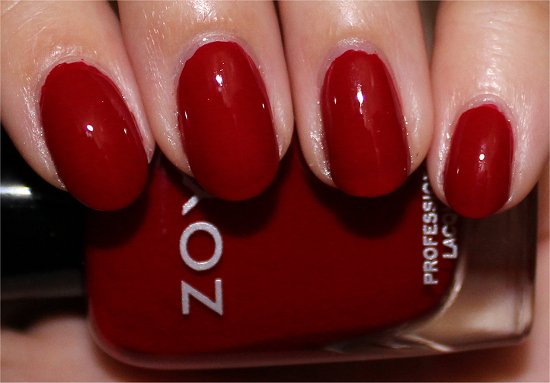
- 2 coats of Zoya Rekha (This was provided by Zoya.)
- Heart & Heartbeat: Milani Nail Art Nail Lacquer Black Sketch (This was provided by PR.)
- Seche Vite Dry Fast Top Coat
Flash Photos


Sunlight Photos


Natural Light Photos


*~* Heartbeat Nail Art Tutorial *~*

What I Used:
- CND Stickey Anchoring Base Coat
- Zoya Rekha
- Milani Nail Art Nail Lacquer Black Sketch
- Seche Vite Dry Fast Top Coat
Step 1: Apply a Base Coat
Step 2: Paint Your Nails a Base Colour
Okay, so I was already wearing a red nail polish as an existing manicure for a few days. But, if you’re freshly painting your nails, make sure that you wait about 10-15 minutes to allow them to dry a little before proceeding to the next step. You don’t want the polishes to bleed…unless you want bleeding heart nails. (Actually, that might look really cool!)

2 coats of Zoya Rekha
Step 3: Draw the Heart
I used a black striper because it gave me more control over drawing what I wanted. You may prefer to just use your regular brush from a black nail polish if it’s easier.
Decide which nail you wish to accent with the heart.
My tip for drawing the heart is to first draw a “V”. Then, go back with more polish and ‘flesh it out’ – i.e. make the two round parts at the top curvier so that the whole thing resembles more of a heart than a V.

Step 4: Add the Heartbeat Lines
Take your striper brush and draw a line with random zig-zags. You’ll want to do this roughly on the middle of your nails.
I suggest creating more short and tall contrasting peaks because that’ll look more interesting. See what I did on my pinkie? I think it would look better if you do that kind of pattern on the rest of your nails instead of what I did on my index and middle fingers. The more variation in peak height, the more it actually looks like a crazy heartbeat!
Now, since the heart you painted early has a thick layer of polish, I advise that you wait a good 30 minutes or more to allow your nails to dry. If you rush to put on a top coat, you’ll smear it…and while a bleeding heart design is very cool, if you didn’t want it to be one, you may be very disappointed. So…patience, grasshopper! 😉

Without top coat
Step 5: Add a Top Coat
After you add a top coat, the ‘bumpiness’ of the heart will smooth out a little.
Hope that you enjoyed this short and easy nail-art tutorial. I especially like sharing nail designs with you that don’t require too many steps and that utilize only a few tools because I feel like they’re more accessible to the general public and aren’t too intimidating. And once you build up your confidence with simple nail art, you’ll dare yourself to try crazier and more complex designs. 🙂
Would you ever try heartbeat nail art? What makes your heart race? Do you like simple or complex nail art more?


I am totally going to have to try this, I kind of want to do a bright version of this with a neon red or pink. But it looks like something I can do, hehe.
Jessica (Sparkle and Shine Nails) recently posted: NOTD: Color Club Fashion Addict, STAMPED!
Hey Jessica!
Great idea to do a bright version of this. It’ll really pop then! 🙂 Have fun wearing it.
omg i love this so much ! it makes my nail polish heart beat ! 😀
i totally have to try this out. i think im gonna do it with a pink…
~R<=)]
Randi recently posted: Final erster Schultag Mani
Hey Randi!
Hehehe! 😉 Pink is a great choice. Do you have a particular one in mind? China Glaze Shocking Pink maybe?
now i’ve got a new idea: a blue heart on the thumb and a pink one on the pinkie. the base color is gonna be black and the hartbeat (white) connects them (blue = boy, pink = girl) <3
Randi recently posted: Final erster Schultag Mani
Now THAT is a cool and very original idea. Please take photos when you do it. I must see it! 😀
Hey Mary,
i did the connected heartbeat nail art 😀 pls check it out and tell me what u think: http://noodlemynails.blogspot.be/2012/09/heartbeat-nail-art.html (im not sure if the link works… :S but i hope so: just try 😀 )
~R
Randi recently posted: Heartbeat Nail Art
Hey Randi!
You did a wonderful job! I really like how everything flows well and is connected. Cool idea to use two different-coloured hearts. 🙂
What a cool design! 🙂
Gelic’ nail art recently posted: Yellow and black geometrical shapes nail art
Hey Gelic’ nail art!
You should try it – it’s soooo easy and fun to wear. Plus you don’t even need to use a lot of tools or nail polishes to get the job done.
love these super cute! love that red too!!
Amanda (Mae) recently posted: NOTD 66 – Teal Ribbon Month
Hey Amanda!
Thanks! 😀 Do you think you’ll try it out sometime? You can whip it up in no time at all.
Cute nail art! Def another tutorial you made that I plan on using!
Karen recently posted: Lac Attack Butterfly Kisses
Hey Karen!
That’s very flattering – thank you! 😀 Do you know which polishes you’re going to use for the base? And do you think you’ll use black, white, or another colour for the lines and the heart?
Just found this site and within 5 minutes have got brilliant nails that I love! Gone for the traditional blood-red and black this time but think it will look amazing in neon colours too!
Hey Emma!
So happy that you found your way here. And I’m flattered that you chose to recreate this design. Thanks for showing me on Twitter. (I retweeted your photo so that all my readers could see it. You did a wonderful job!)
Lovely tutorials! Even though it looks awesome but could a lot better if the heartbeat lines were done with opposite vibrant color like white or light pink. Your nail looks great though!
Hey Sandra!
I agree – the heartbeat lines need to contrast more against the red background, so it’s easier to see. It would also be cute to do dotted lines instead of solid ones.