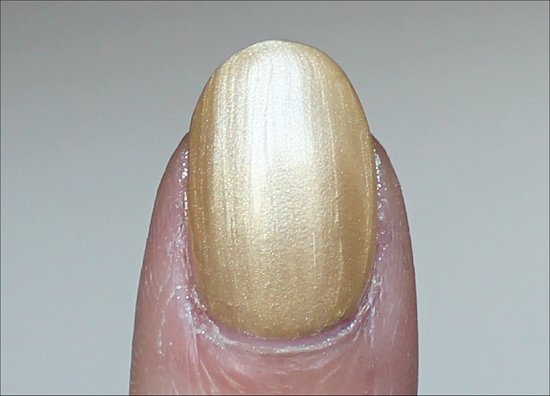
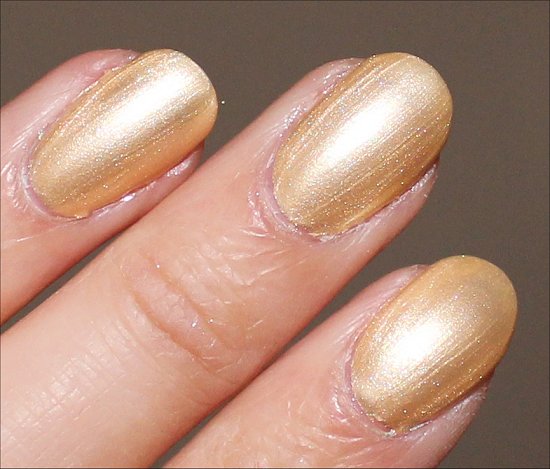
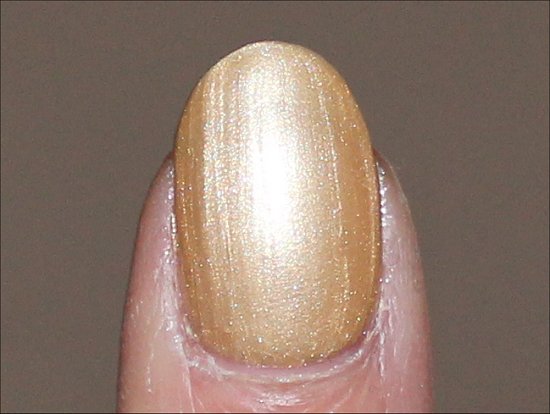
 Gold nail polish is very blingy, if you go for the yellow-toned variety. However, when you sport one that leans more to white gold like Zoya Brooklyn, it gives a more sophisticated look.
Brooklyn is one of the shades in the Zoya Awaken Collection, which I did a Quick Look post on previously.
This shade is very pigmented, and there’s a fragility about the colour that makes it look chic instead of tacky.
Back in the day (elementary school, to be exact!), I used to have a satin, long-sleeved t-shirt in this exact colour! Nobody else in my class wore anything like it, but I think that’s why I loved it. Haha, even if it was ridiculous to wear something like that to school, I did, and I felt confident and luxurious. I wonder where that shirt is now.
Side note: Brooklyn is my niece’s middle name, so when I first read the name of this nail polish, I immediately thought of her!
Zoya Brooklyn Pictures

Natural Light

Flash

Natural Light

Flash

Zoya Brooklyn Swatches
All swatches have:
- OPI Nail Envy Nail Strengthener (Used as a base coat)
- 2 coats of Zoya Brooklyn
- Seche Vite Dry Fast Top Coat
Natural Light Photos


Flash Photos


Claim: TRUSTED
- White-gold shimmer metallic (Yes)
Key Notes
- Name: Zoya Brooklyn
- Collection: Zoya Awaken Collection 2014
- Quick Look: Click here to see my Quick Look post on the Zoya Awaken Collection
- Colours Available in the Collection: Hudson, Brooklyn, Cole, Rebel, Dillon & Dot
- Amount: 15 mL (0.5 fl. oz.)
- What I Paid: Nothing! (This was provided by Zoya.)
- Where to Buy: Zoya website & NailPolishCanada
Zoya Brooklyn Review
Colour
Gold can be tricky to wear because the wrong undertone can severely clash with your skin tone, so it’s all about trial and error.
This one is a white gold, so it’s more subtle than the yellow-toned variety. I think this type of gold tends to look more sophisticated, and while it’s softer, it’s still flashy.
With a metallic this strong, it would be interesting to see it stamped over for a dramatic effect. And I am curious if you could stamp with it because it’s fairly pigmented.
Finish
I don’t mind some brush strokes, but when they’re very obvious, I think that it can detract from the colour and put all the focus on the lines on your nails.
If you rush, you’ll get more brush strokes, so I suggest that you take your time to at least make sure the brush strokes are relatively straight on each nail.
I’m not crazy about visible brush strokes, so I was disappointed how obvious they looked. That being said, I can still get a lot of use out of this polish. I have some ideas for stamping over it. (When you do nail stamping over a strong metallic, it always look awesome! Plus the stamping will help to conceal the brush strokes.)
Application & Formula
The formula of this was very pigmented, so I only needed 2 coats to get full coverage. Also, it was smooth and easy to control – the polish went on my nails exactly where I guided it.
Pros
|
Cons
|
Final Verdict: 6/10
Although I love how sophisticated this white gold looks, the visible brush strokes will prevent me from wearing this polish solo. The next time I bust it out, I’m going to stamp over it, and I think I’ll like it a lot more that way.
Do you mind visible brush strokes? How do you minimize brush strokes on your manicure? Do you also do the ‘trick’ of stamping over a manicure to reduce the appearance of brush strokes?


Ooooo love the shimmer!
Hey Melissa!
It would really pop under nail stamping! 🙂
I’ve read somewhere (can’t remember where… sorry!) that sponging on the last layer eliminates brush strokes.
Maybe that would help you wear this one solo again?
Hey Joyce!
That’s a really good idea, and it’s a technique that I’ve never tried. It’s worth a shot – thank you so much for the tip!