 Hello, dear Ssswatch And Learn readersss!
Recently, I was contacted by Nicole by OPI’s PR team and invited to participate in a nail-art challenge.
Using only 2 shades, Nicole by OPI Hit the Lights and Nicole by OPI Spring Break, me and a few other bloggers were asked to create a summer manicure.
I already had the 2 colours from the Nicole by OPI Selena Gomez Collection, so I took the challenge. 🙂 (It’s the first nail competition I’ve ever entered!)
The winner will receive a prize pack as well as a featured spot on the website! The public will vote on their favourites to crown the winner. (When I get the link to the voting page, I’ll be sure to let you all know!) Edit: See the link below to vote now!
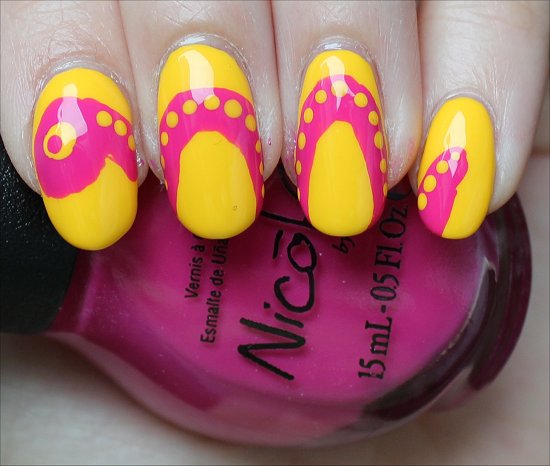
Here’s the simple look that I came up with. I’m calling this freehand snake nail art It’sss Sssummer! 😉
I think it’s an appropriate summer manicure because it’s bright, quirky, happy, and fun – characteristics that I associate with the season. It also serves as a reminder to make the most of warm weather…before it slithers away! 😉
Also, I chose to make my snake polite – it kept its tongue inside, thank you very much! Hehe!
It’s a spin-off of my freehand Loch Ness Monster nail art that I did back in 2011.
Edit: Please VOTE FOR ME in this Nicole by OPI Canada Blogger Challenge before July 19, 2013! (Thank you!)
STEP 1: Go to this link. http://ow.ly/mT2Tz
STEP 2: “Like” my snake nail-art photo
Snake Nail Art Swatches
All swatches have:
- OPI Nail Envy Nail Strengthener (Used as a base coat)
- Background:
- 3 coats of Nicole by OPI Hit the Lights (Yellow – Provided by PR)
- Snake’s Body & Pupil:
- 1 coat of Nicole by OPI Spring Break (Pink – Provided by PR)
- Snake’s Eye & Dots Along Back:
- 1 coat of Nicole by OPI Hit the Lights (Yellow – Provided by PR)
- Seche Vite Dry Fast Top Coat
Natural Light Photos


Flash Photos


*~* Snake Nail Art Tutorial *~*

What I Used:
- OPI Nail Envy Nail Strenghtener (Used as a base coat)
- Seche Vite Dry Fast Top Coat
- Nicole by OPI Spring Break
- Nicole by OPI Hit the Lights
- Daniel Stone Art Tool #2
- Zip-lock plastic bag
Step 1: Apply a Base Coat
Lately, I’ve been trying out OPI Nail Envy, which is actually a nail strengthener that doubles as a base coat.
I’ve used tons of different base coats, and I have to say that so far, this one’s working out really well. It has protected my nails against a lot of darker polishes. Might just be my new favourite base coat!
But I can’t tell whether it strengthens the nails since I’ve always had pretty strong nails (thanks to genetics).
Step 2: Paint the Background
I opted for a bright yellow background so that the snake could stand out more. You know how snakes are – those attention seekers! 😉 Hehe!
This is Nicole by OPI Hit the Lights. I used 3 coats.
You don’t have to use yellow. Come up with your own fun combinations – they’re your nails! 🙂 Go nuts! Life is too short to play by strict rules when it comes to nail art.
Be sure to wait about 8-10 minutes before proceeding to the next step. The base colour doesn’t have to be dry. It just shouldn’t be fresh and wet.

3 coats of Nicole by OPI Hit the Lights
Step 3: Start Painting the Snake’s Body
Now comes the really fun part! The ssssssssnake!
I wanted it to slither across all of my nails. To do this, I started by painting the head on my index finger. I used the brush right from the Nicole by OPI Spring Break bottle and then added a diagonal line to represent the arched neck.
On my middle and ring fingers, I painted upside-down “U”s. Then, I added a perky little tail on my pinkie.
Tip: I found it easiest to paint the upside down “U”s in several short strokes. I mean ssseveral ssshort ssstrokes. 😉

Step 4: Give Your Snake Some Acupuncture (Hehe!)
I put some yellow polish onto my Ziplock plastic bag. You could use a palette, a piece of foil, an old plastic bag, or anything that won’t let the polish seep through.
Using a small dotting tool, add tiny dots all along the back of your little Mr. Snakey Snake.

Step 5: Start Giving Mr. Snakey Snake Some Sight
Using a larger dotting tool, the back of an old makeup brush, or even the end of a cheap art brush from the Dollar Store, dot on some yellow for the eyeball.

Step 6: Add the Pupil
Using the smaller dotting tool (the one you used for the dots on the back), add a pink pupil.
Wait a while before adding a top coat, or you’ll risk smudging all your hard work. (I suggest waiting a minimum of 30 minutes, but if you do more time, it’ll be even safer.)

Step 7: Add a Top Coat
To further avoid smudging, get a large bead of top coat on your brush, and when you spread it over your nail, try to barely touch your nail with the actual brush. Just let the polish flow over your nail. I’ve had the best results with this method.
Nostalgia Lane:
One of my funny memories of my father was when we were in a pet store. I think I was 9 years old.
I’m scared of real snakes, and my dad absolutely loved them.
A staff member brought out a snake. I saw, and I bolted out of the store. I could faintly hear my dad calling out to me, saying with clear excitement in his voice, “Mary! They’re bringing out the snake!” Haha, I already knew – that’s why I ran away! My dad, on the hand was happily petting the snake.
Even today, if I see a zookeeper bring out a snake (usually wrapped around her/his neck), I make a beeline to the exit. Hehe! *Bawk bawk bawk*
Will you be sporting snakes on your nails? Will you wear snake nail art while on a plane? (Hehe, ‘Snakes on a Plane’!) Are you scared of snakes?
Edit: Please VOTE FOR ME in this Nicole by OPI Canada Blogger Challenge before July 19, 2013! (Thank you!)
STEP 1: Go to this link. http://ow.ly/mT2Tz
STEP 2: “Like” my snake nail-art photo
I would greatly appreciate it if you could also help me spread the word!
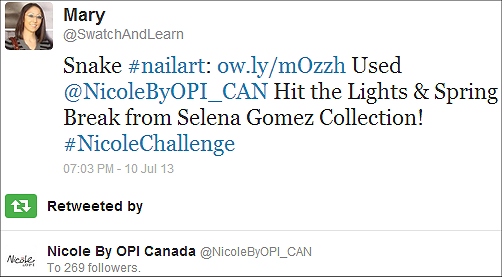
Edit: Yay! Nicole by OPI retweeted my blog post! 🙂


Very cute! I love it!
Hey Jennifer!
Thank you! 🙂 I loved wearing this manicure. Had it on for a few daysssss! 😉
Now I see the snake, is a kind a children s book snake, well done 🙂
Hey Icequeen81!
Haha, yeah, I went the cartoonish route. Real snakes send shivers up my spine!
So cute! I’m not afraid of snakes, but my mom is terrified of them. I should wear this on my nails when she’s driving me nuts. Haha, I’m just kidding. I’m not that mean and I’m sure she’d think it’s cute too.
Hey Tanya!
Hahaha, yeah, you should try recreating this manicure. It’sss ssso much fun to wear! 😉
So cute!! May have to steal this idea. 😉 Good luck!!!!
Lizzy recently posted: Zoya: Cheryl & China Glaze: Oxidized Aqua
Hey Lizzy!
Hope you have fun recreating this look! Please show me your manicure – I’d love to see, and I’m sure my readers would, too!
How cute! I will definitely be trying this look… in green & blue maybe?
I’m not afraid of snakes, reptiles, or amphibians. However, I become a blithering idiot over spiders and other creepy crawlies UGH!
Hey Shelby!
Green and blue sounds like a fantastic combination! Please share your finished manicure with me. I’d love to see how yours turned out. I love seeing how everybody puts their unique spin on something.
Very nice mani! And also the original among those I’ve seen on the facebook photo-gallery!
I hope you’ll win the constest!
Sorry I couldn’t vore for you as I’ve got no account on facebook, so I was only able to see the pics!
But, if there would have been another way to vote, I’d be among your faster supporters.
Good Luck!
Floria
Hey Floria!
Thank you so much for saying that! It means a lot, especially because all the other women who submitted an entry put a lot of thought into their designs. I was honoured to be invited to join in the fun!
That’s okay that you couldn’t vote. 🙂 The fact that you left a comment to boost my spirits already makes me feel like a million bucks!
I love it! Bright and fun, and the snake is cute) I’ll try to recreate for sure!
love the colour combo