 ** This post was written by Fiona. She no longer blogs for Swatch And Learn. However, Mary still continues to blog and will be happy to reply to your comment. **
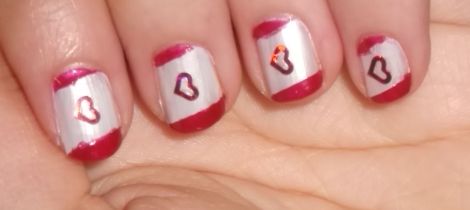
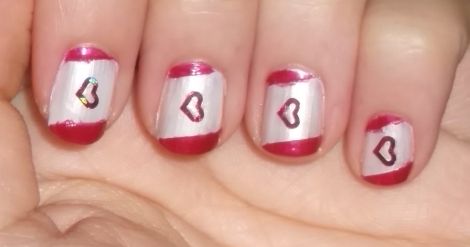
Boo. My second attempt at nail art kind of failed. Sad face. They don’t really even look like the Canadian flag! Hahah. Even though I don’t really want to post it, I have to because Swatch And Learn is proudly Canadian. And since I did an American flag one, I have to represent north side of the border. I had a blast with the American flag one, especially when I inspired a co-worker to do a tape manicure design, too! That’s always encouraging.
I also had fun with my Canadian Flag nails. I got to work with Sally Beauty Sprinkles – I used the heart shape because I <3 Canada. Tee hee. I’m still working on my taping technique because there was, again, some bleeding. If anyone has any advice for me, I would love to hear it. I’m just starting out and want to get better!
~Whisper~ I like my American Flag nails (design wise) better because it’s cuter and more intricate. But shhhh. Don’t tell our Canadian readers. ~End whisper~
Canadian Flag Nail Art Swatches & Pictures


How to Create Canadian Flag Nail Art Tutorial
Step 1: Get your supplies ready! Here’s what I used/you need:
- White: Sally Hansen Hard As Nails Platinum
- Red: elf Medium Red
- Base & top coats of your choice
- Scissors & Scotch tape
- Maple leaf: Nail art plate image, sticker, tattoo or Sally Beauty Heart Sprinkles
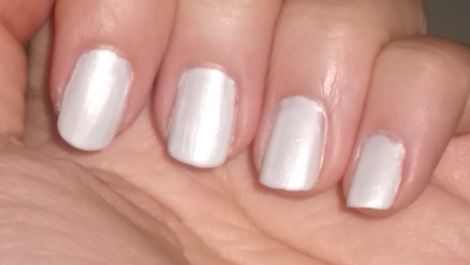
Step 2: Paint your nails with the base coat, then your white.
Wait for it to dry completely before moving on.  Step 3: Section your nails with Scotch tape.
I intended for the diagonal to be more slanted, but they’re more horizontal than I would’ve liked. 🙁 For the sectioning, you’ll have to cut the width of the tape (can’t use the tape as is or it’ll cover your entire nail). Adjust the width according to the finger since the nails are of different sizes.  Step 4: Apply the red, let dry, then remove the tape.
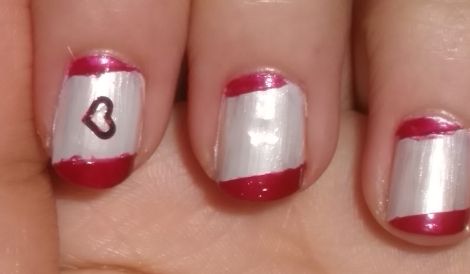
Because I sectioned it too horizontally, there isn’t a lot of room for the red. 🙁 So I suggest making it more slanted on yours.  Step 5: Dab a dot of top coat in the center (if you’re using a Sprinkle like me).
This will act as a glue to hold the heart in place. I used a thicker top coat so that I have a little bit more time to apply the heart in the right position before it dries.  Step 6: Apply a top coat to add shine & protection.
If you’re using a Sprinkle or a sticker, you might have to add 2 coats for a smooth finish depending on your TC. 
Tips on Creating Canadian Flag Nail Art
- Don’t make the white section too horizontal; make it more slanted for visual interest.
- Use good tape & make sure it’s completely down.
- Wait until everything is dry before taping or applying a TC.
- Apply polish in the direction away from the tape.
The Canadian flag is definitely simpler than the American flag. 🙂 In terms of nail art design, it means it’s not as interesting. But in terms of personal patriotic pride, I felt proud wearing this on my fingers. Oh, Canada. Go, Canada! 🙂 I hope our readers from around the world enjoys this, too. How would you create the Canadian flag on your nails? What would you use in place of the maple leaf?
Related Country Flag Nails:


This is REALLY cute! Love the little heart!
imfeelingnailventurous recently posted: Christmas in July?????!!!!???
Aww! Thanks! Hearts make everything good. 😛
I think it’s cute too! I have had a little trouble with polish getting under the tape, but I’ve also heard to take the tape off while the polish is still wet… you might be able to touch it up then. Though I don’t really know that much since I’ve only done a few myself! 😉
Leah recently posted: Wet N Wild Comfort Zone Palette (Neutral Side)
Thanks, Leah! I’ll definitely try taking the tape off sooner! I’d love to see some of the tape manis you’ve done! Be sure to share a link!
So far, the only ones that I’ve gotten pictures of have been with crackle polish. I actually take the strips of tape that I’m using and cut them down the middle to make them thinner. I tried using the strip of tape an moving it around, but mad a mess, so… yeah. Here’s a link to one of the tape manis. http://simplysilhouetted.blogspot.com/2011/07/essie-dive-bar-china-glaze-crackle.html
Hi Leah!
Just checked out your tape mani. It looks great! It’s simple, yet very sophisticated. I really like the contrasting textures, and it makes me want to do a matte and glossy tape mani soon. 😛
This is a cute design! I like the heart idea, lol ;). Yay for Canadian pride! Everyone in my family is a Canadian citizen. Except for me. I’m the lone yankee :P.
Hi Ruthe!
I didn’t know your family’s Canadian! Did you move to the states for school?
After coming to the US from China, my parents lived in Canada for a few years and they loved it so much they became citizens (they were previously Chinese citizens). Then they had my older brother while living in Canada. After 2-ish years my dad got a job here in California and so they moved and after coming to California, they had me. I’ve been living in the US since, though apparently I visited Canada when I was about 2. Honestly, I don’t remember that trip at all, lol 😛
Wow! Ruthe, you should come to Canada for a visit! And… eat some poutine or something! 😛